The Daheng Galaxy Viewer program is the main tool to test and program the camera. With Galaxy viewer it is possible to change and store camera parameters and to capture and store images. It has multiple plugins for additional features like crosshair, grid and LUT. We are going to show you the possibilities and how to use the Daheng Galaxy Viewer.
Step 1: Install the Daheng Camera machine vision SDK.
 **Please don't connect the Machine Vision Camera before or during the SDK's installation**
You can find the latest version of our SDK in our
download area. After downloading the SDK please install it, by running the file displayed to the right.
Once SDK is installed:
- The software Galaxy viewer will be installed.
- All camera documentation will be available in the folder: C:\Program Files\Daheng Imaging\GalaxySDK\Doc
- Programming examples will be available on C:\Program Files\Daheng Imaging\GalaxySDK\Samples
Step 2: Opening the Galaxy Viewer.
The demo software is installed at the location:
C:\Program Files\Daheng Imaging\GalaxySDK\Demo\Win64\GalaxyView.exe
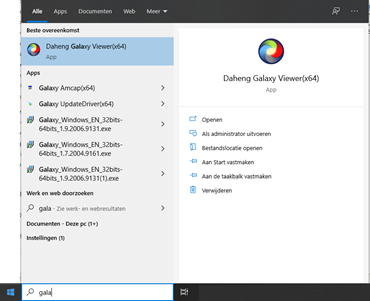
Easiest way to start the Galaxy Viewer is by typing galaxy in your windows search bar:
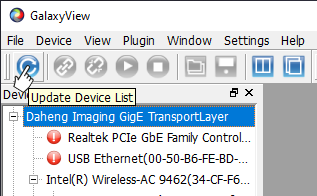
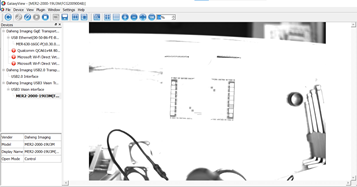
Once you run the program it will automatically scan for connected cameras in the network and USB ports:
On the left side you can see Daheng connection tree for GigE/USB2.0/USB3.0 industrial cameras. You can also see which network cameras are connected to which network adapter.
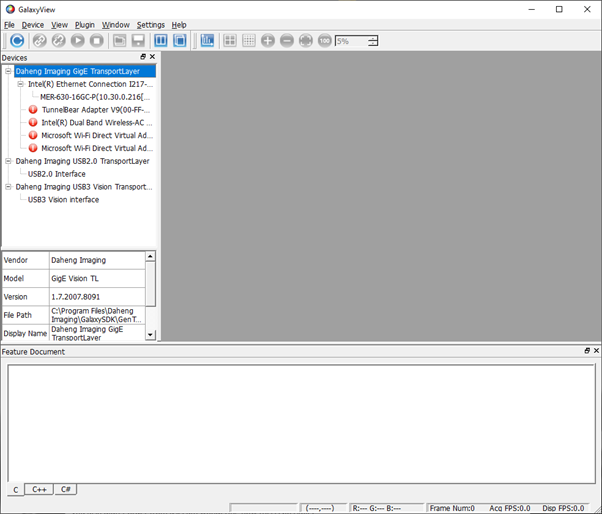
If the cameras are connected correctly, they will be automatically added to the tree at startup of the program or after the program refreshes the view.
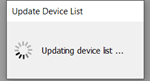
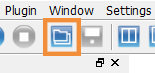
You can manually scan for devices and update the device list using the icon on the left.
Step 3: Connecting to the camera
The screenshot below shows that a
MER-630 Ethernet camera is found, and a
MER2-2000 USB3 camera.
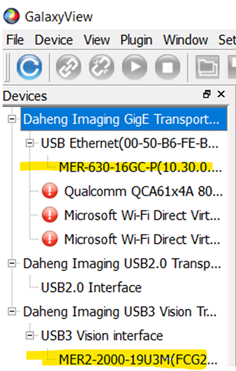
To connect to the specific camera, simply select the name and either double click it or press the second icon from the left “Open device”. It is possible to open multiple cameras.
Step 4: Controlling the camera
When connected to the camera, the camera sends a XML file to our GalaxyViewer to tell the GalaxyViewer its feature set. These features / camera parameters are displayed on the righthand window. Here you have control to change the parameters of the camera.

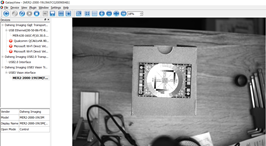
Press “Start acquisition” button to acquire images and have live view from the camera.
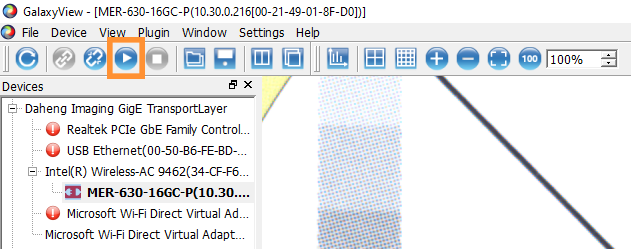
The camera will show live view with its default settings. Typical parameters to adjust are:
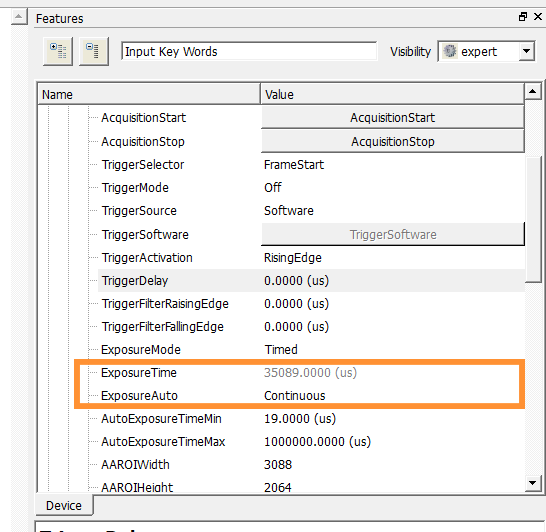
Under “Remote Device/AcquisitionControl"
• ExposureAuto: once or continuous
• ExposureTime: Manually set the exposure value, only works if ExposureAuto is set to OFF
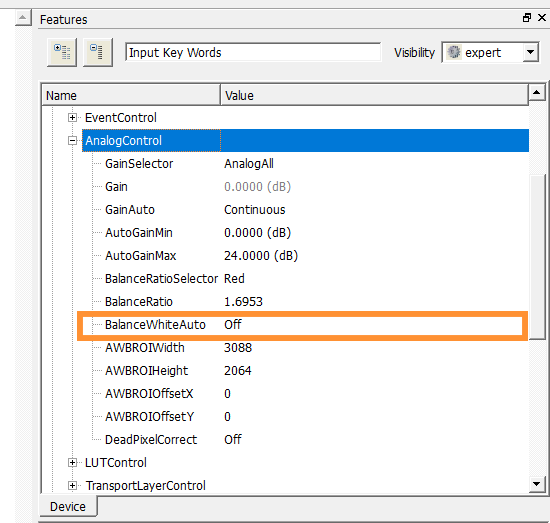
 Under “Remote Device/AnalogControl"
• BalanceWhiteAuto: Only for color cameras, to set the white balance
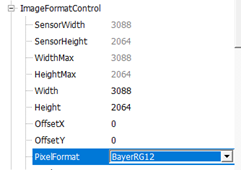
 Under “Remote Device/ImageFormatControl"
• ROI: sets a Region of interest ,* working ONLY when acquisition:STOP*
See
https://www.get-cameras.com/How-to-set-a-Region-of-Interest-(R.O.I.)-inside-an-industrial-camera-in-3-steps
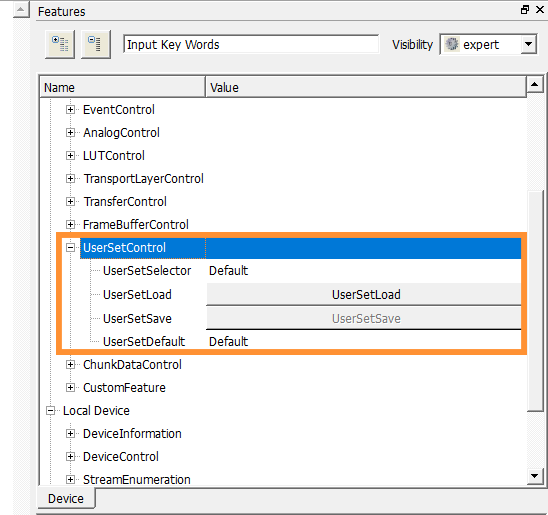
Under “Remote Device/UserSetControl”
• UserSetControl: to save your above parameter changes to UserSet0
See
https://www.get-cameras.com/How-to-save-the-camera-parameters-in-3-steps
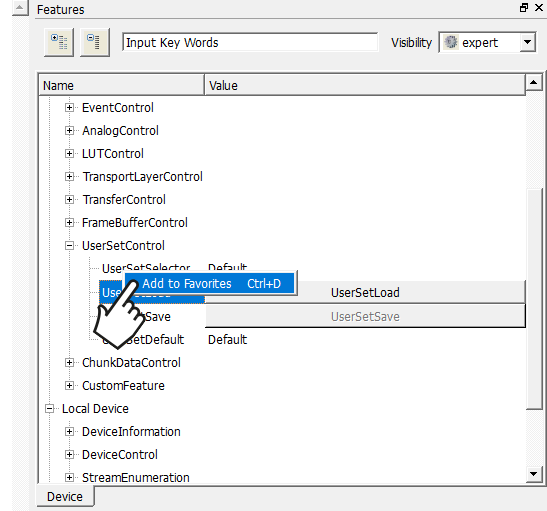
When using certain parameters regularly, you can make them easily accessible by adding them to your favorites. Right click on each option and click on “add to favorites”, those lines will be added at the very top of the option list for quick use.
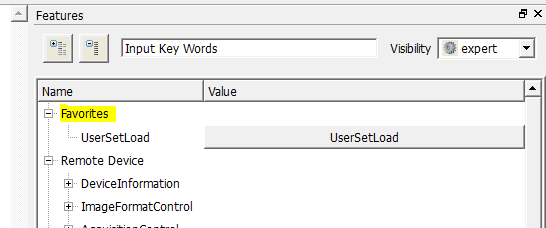 When a parameter is saved to favourites, it is easily accesible.
Result of setting parameters:
Example A: live view with default camera parameters. Example B: Live view after optimizing the camera settings.
A:
B:
Step 5: Using the Galaxy viewer options:
In this section of the article, we show multiple features of the galaxy viewer software. We first show how to use the blue icons that have not been used in step 1 to 4 yet. Then we will walk past every tab in the top bar and explain what you could use it for.
Opening images
It is possible to review images in the Galaxy Viewer. You might want to do this to check the RGB value of a certain part of an image.
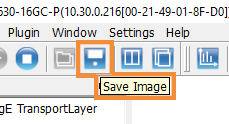
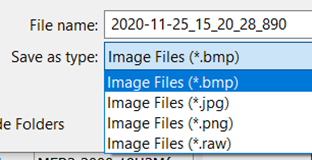
Saving images.
You can click on the save image icon to save the current image. You can select the format you want to save the image in and the filename. We recommend to save images as .PNG to reduce image size without losing image quality.
Tile view
If you have multiple cameras connected, it is possible to split the screen with the tile tool and see both cameras in the same window.

Cascade view
You can also view multiple cameras with Cascade view. This opens multiple windows as displayed on the image below.

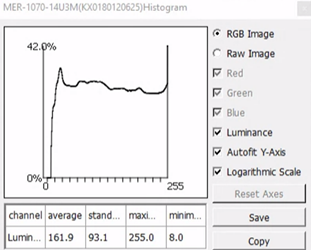
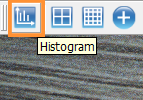
Histogram
Show/Hide image histogram (current overall image values).
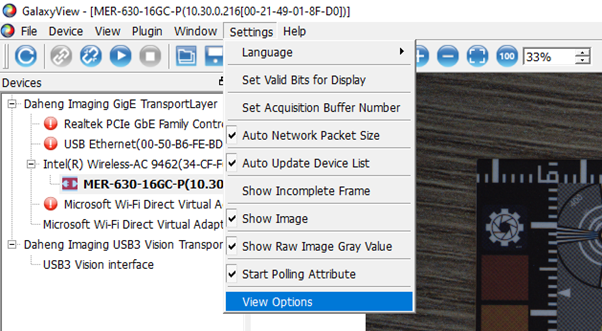
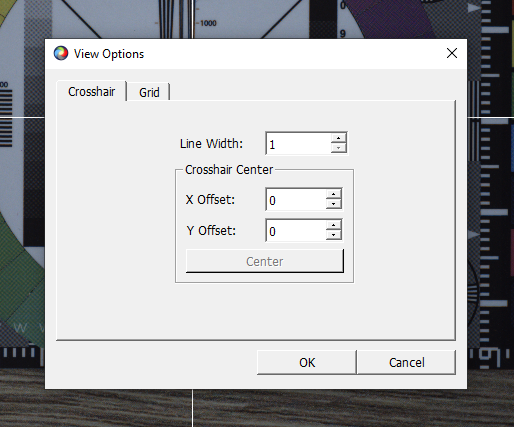
Crosshair
Clicking the Crosshair-button will display a crosshair in the middle op your image. If you want to set the crosshair to a different part of the image, you go to the tab ‘settings’.
You can enter your own values for line width and offset at the window below. Note: Offset [0,0] is the center of the image. To go to the left or up, use a value lower than zero. For example: [-200,-50]
 How to get to the customization of the crosshair
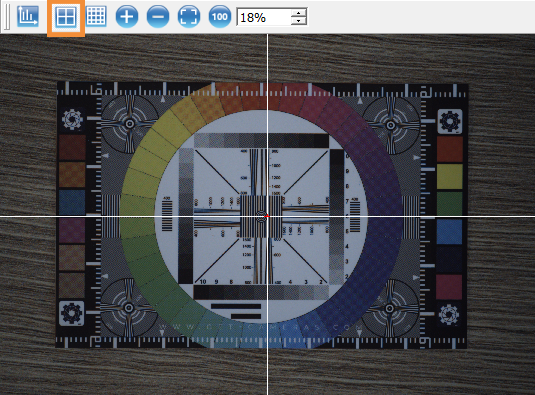
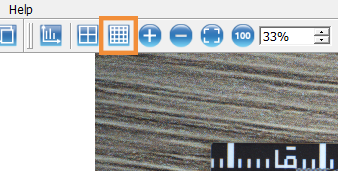
Grid
The Galaxy Viewer software has a grid function. You toggle this grid by clicking the icon.
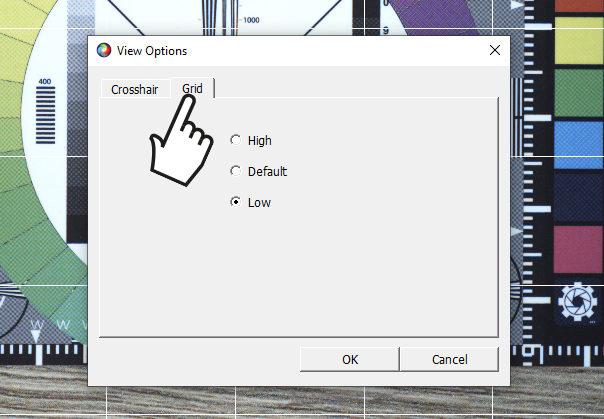
To customize this grid, go to Settings > View options and switch from crosshair to grid. You can now choose between High, Default and Low. A high grid means that the grid is made up of more lines than a low grid.
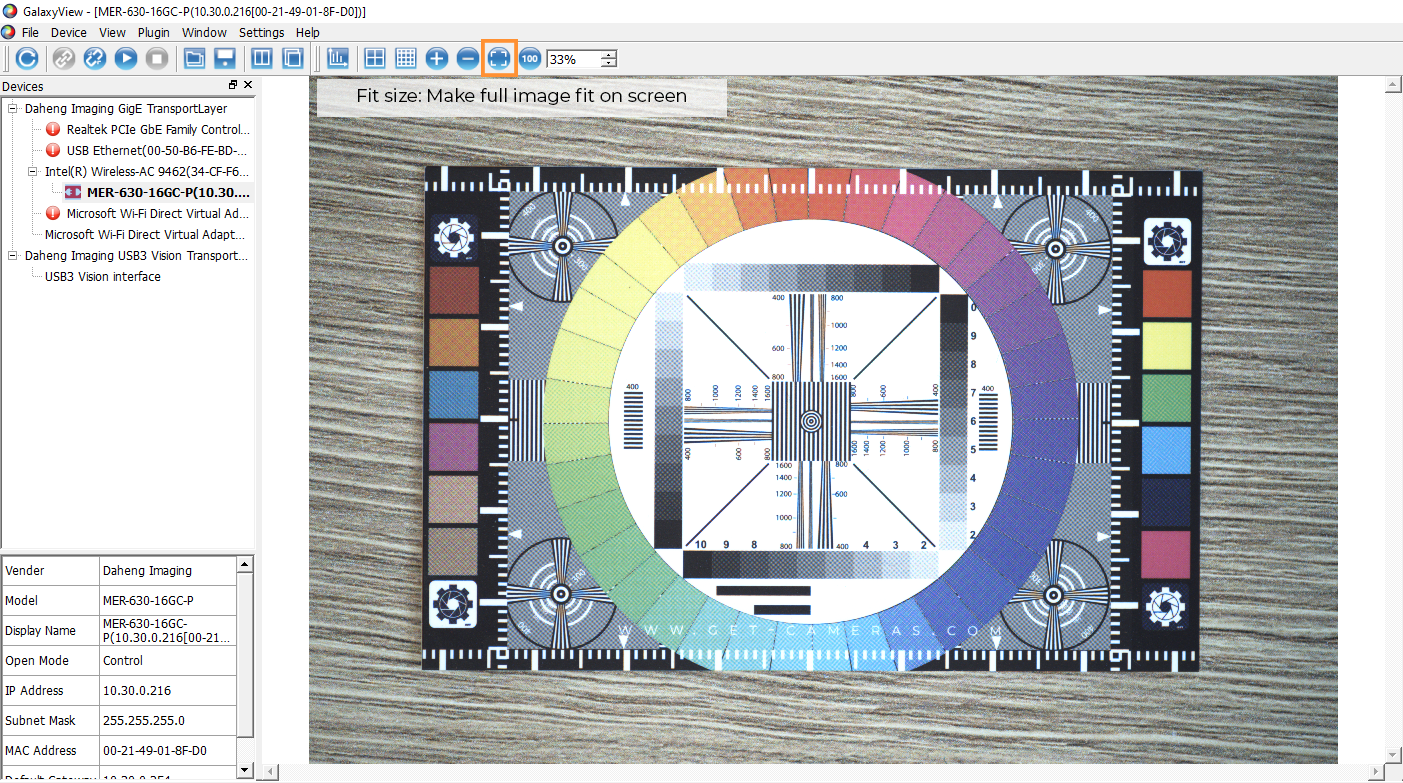
Digital zoom.
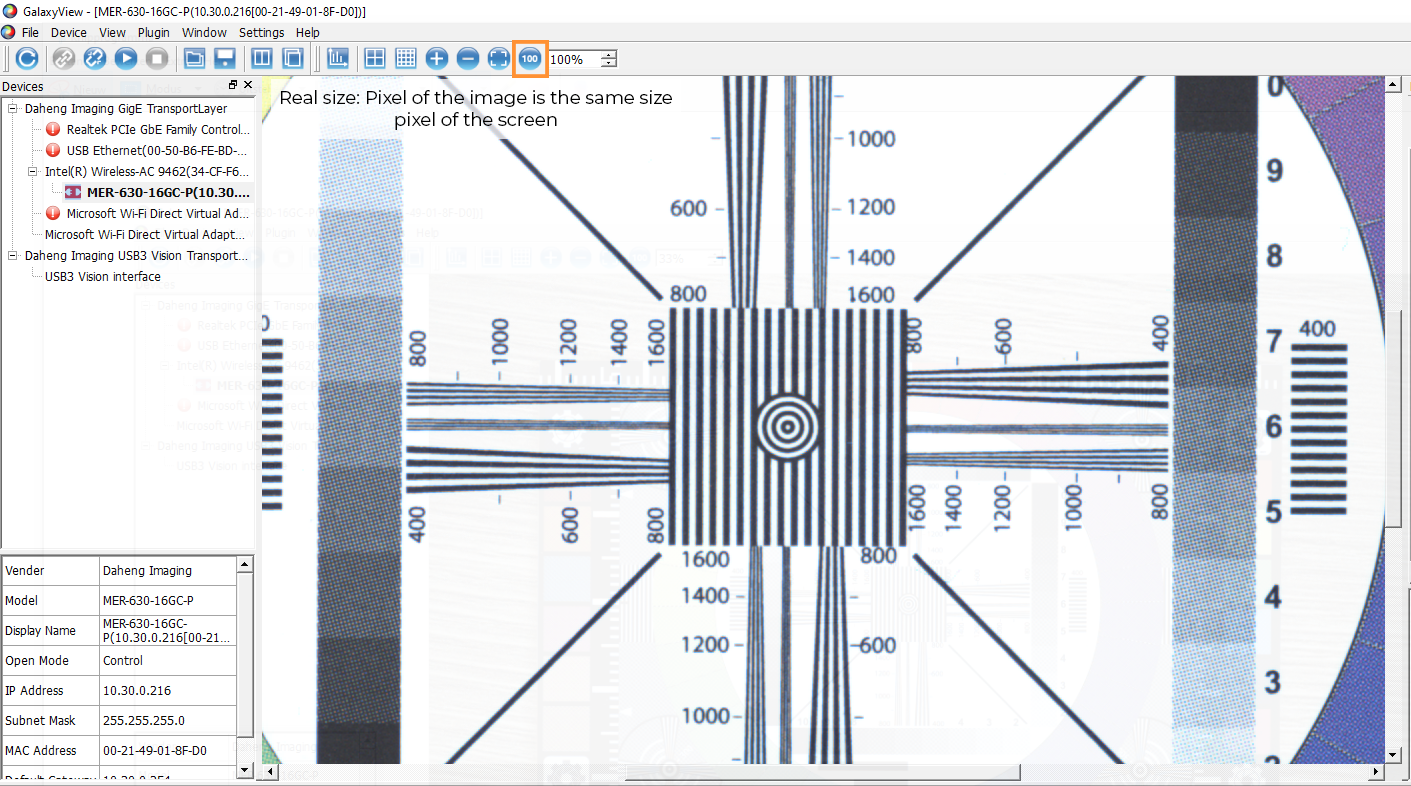
You can zoom in or out of your image by clicking on the + or – icon or filling in a percentage. When you want to see the full image on your screen, you can click on “Fit size”. The Galaxy Viewer will determine the zoom percentage to make your full image fit on the screen.
To zoom in, you can change the zoom percentage. You can click on 100 to make every pixel of the camera 1 pixel on your screen. This feature is very handy when you want to calibrate your lens to get a very sharp image.
 TIP: do you have project with different objects heights? Put the highest and lowest object next to each other while focusing the lens. To get more depth of field, you can close the iris. We recommend to start with F4.0. If the depth of field is not large enough, close the iris further.
Step 6: Using the Toolbar
The Galaxy Viewer software has more options available in the toolbar. This part of the article explains every tab and how to use the tools.
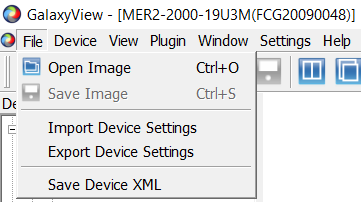
File
Under the file tab are a few options available for you.
You can load an image you have saved. Then for example you can check the RGB value in a part of that image.
When acquisition is running, you can save images
Import/Export device Settings is used to save or restore settings for a specific camera model, serves as backup or is quick way to configure multiple cameras.
Save device XML enables you to save the camera current configuration file with information such as firmware version and serial number.
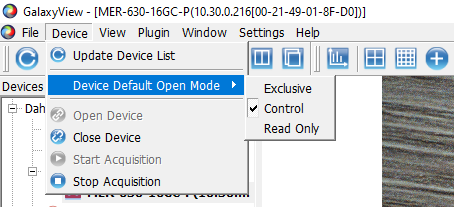
Device
The ‘Device’ tab has the same options as the toolbar, beside “Device Default Open Mode”. Here you can choose the level of user rights set as default when opening the program
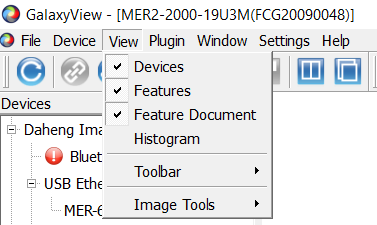
View
Toolbar/Devices/Features/Feature Document -> Toggle display of menus ON OFF
Toolbar/Devices/Features/Image tools -> View the grid or crosshair, and the live image zoom/fit/100% fit
Plugin
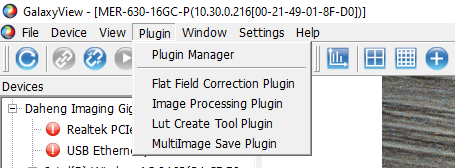 Plugin manager
: The Plugin manager shows you which plugins are active. You can enable and disable these plugins by checking/unchecking the box in front of the plugin. You can also increase of decrease the position of this plugin.
Flat Field Correction plugin (usage): If due to a lens or used lighting the outer portion of the image is darker than the middle, you can add extra gain to those parts. To do this:
- Make the scene white (use a white object that covers the complete field of view
- Use a fixed exposure time and increase exposure until the centre of the image has the value 255.
- Click on acquisition of brightfield images and then on execute FFC.
The plugin will now brighten up the parts which are darker.
Image processing plugin: lets you modify gamma color parameters
LUT create Tool plugin: Look up table. You can change intensity / gamma of pixels using a lookup table
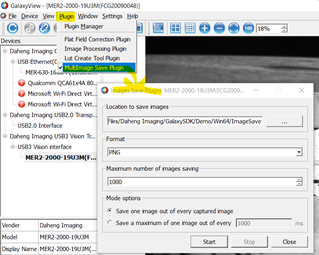
The multiImage Save Plugin: enables you to save multiple images. You can use the MultiImage Save Plugin to time images and save those automatically.
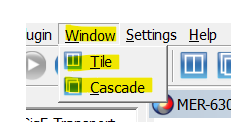
Window
There are two settings under Window. These settings rearranges the live view when using multiple cameras. You can split the screen by clicking on tile, or use the Cascade function. (see full explanation under step 5)
Settings
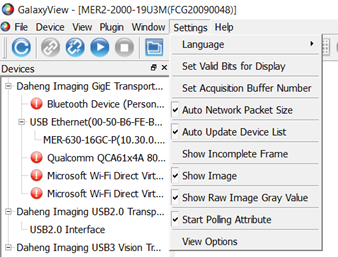 Language
: Select the program language
Set valid bits for display: If you capture images in 12 bit setting, you can select which of the 12 bit should be displayed on your monitor. Your monitor is more likely to only be capable of 8-10 bit.
 Set Acquisition buffer number
: Set how many frames are kept in the camera buffer before being sent out, more frame give stable framerate at cost of acquisition speed.
Auto network package size: Auto-negotiate the best network package size and display.
TIP: this overwrites the GevSCPSPacketSize and GevSCPD values!
See step 3:
https://www.get-cameras.com/Connecting-multiple-GigE-cameras-to-one-ethernet-port
Auto update device list: Automatically scans for new cameras periodically
Show incomplete frame: Show incomplete frames in live view
Show image: Turn Live view ON or OFF (Disp FPS)
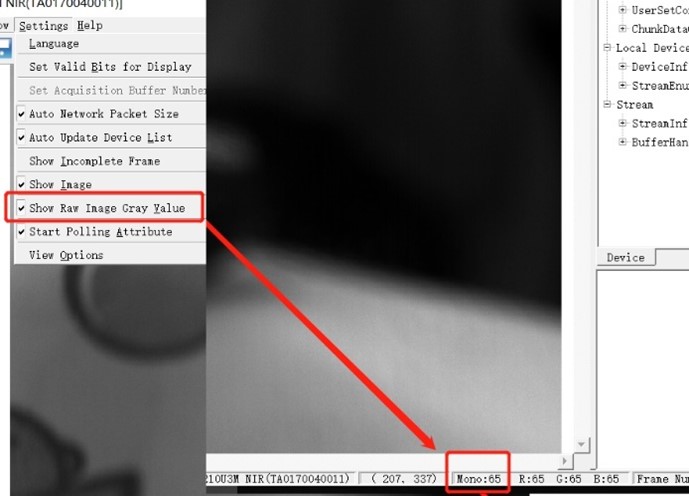
Show Raw Image Grey Value: Displays the value on the bottom of the screen
 Start polling attribute
: Every x seconds the attribute values are checked to see if these are changed. For example, put the camera on ‘auto exposure’ and have the “polling attribute active”. When an object is placed in front of the lens, the image gets dark and the exposure time is increased.
You can see the value of the exposure time increasing.
When polling attribute is inactive, you will not see the value of the attribute exposure time changing, but you will see in live view that the camera is adapting the exposure time.
View Options: Options about the grid/crosshair look.
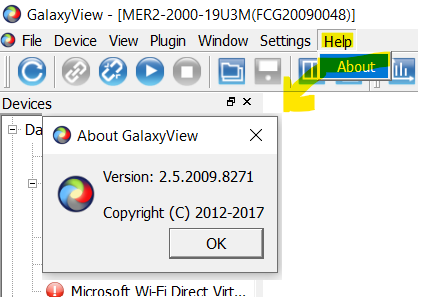
Help
Show the current version of the Galaxy view.
If you have any questions about the Galaxy Viewer, make sure to contact our
customer support department. We strive to answer your questions withing 24 hrs.
